
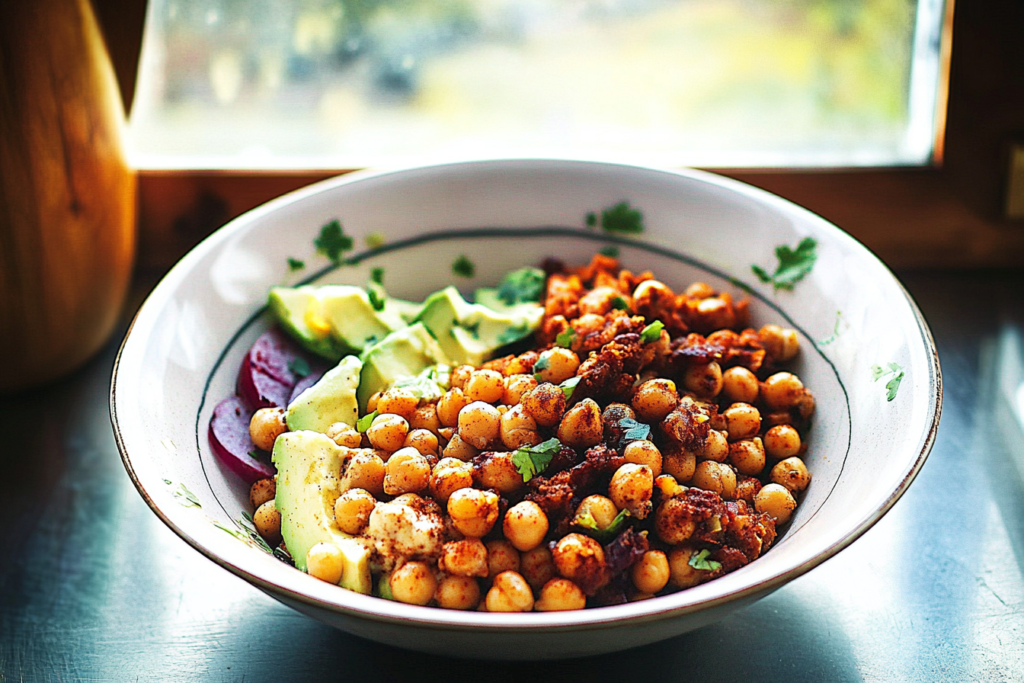
Looking for a fresh, easy, and healthy summer meal? These Delicious Small Roasted Chickpea Bowls are just what you need. Packed with flavor and texture, they’re a great way to enjoy plant-based protein in a fun and customizable format. Whether you’re planning lunches for the week or throwing together a quick dinner, roasted chickpea bowls offer a crunchy, satisfying bite with wholesome ingredients you probably already have at home.
Roasting chickpeas brings out a nutty flavor and crisp texture that makes them the perfect base for all kinds of toppings. Add colorful veggies, whole grains like quinoa or rice, and creamy dressings or avocado for a bowl that’s as beautiful as it is delicious. You can enjoy them warm or cold, making them perfect for busy weekdays, outdoor meals, or potlucks.
Why You’ll Love This Roasted Chickpea Bowls
There are plenty of reasons these roasted chickpea bowls are summer favorites:
1. They’re Healthy and Filling – Chickpeas are loaded with plant-based protein and fiber, so they keep you full and energized without weighing you down.
2. Totally Customizable – You can mix and match veggies, grains, and sauces depending on what you have in your fridge or what flavors you’re craving.
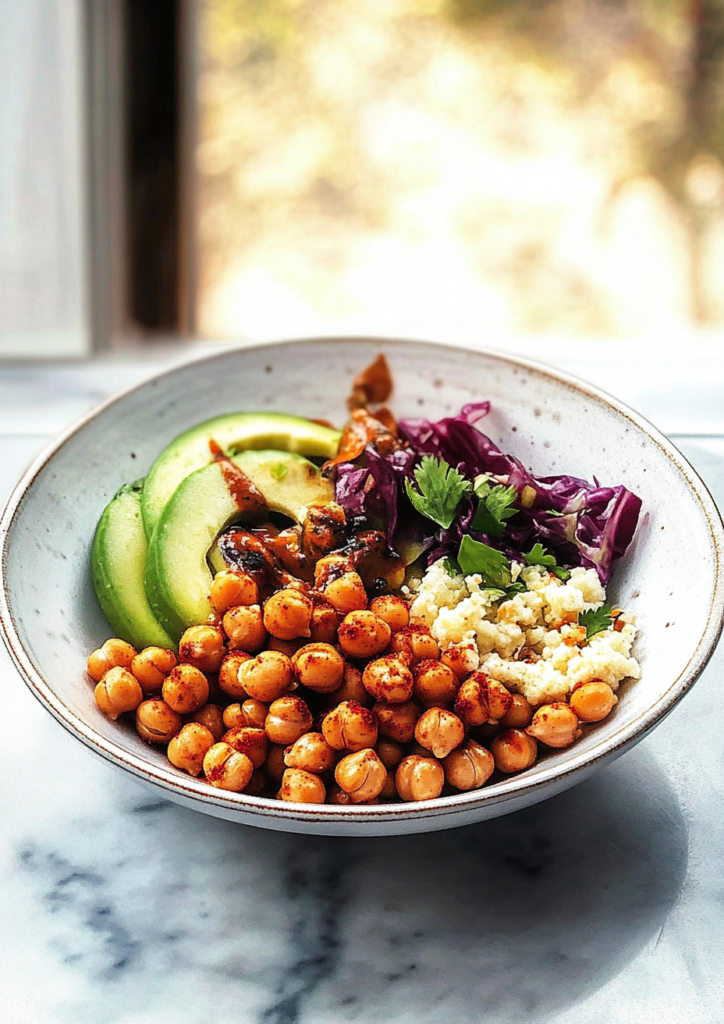
3. Crunchy + Creamy Combo – Roasted chickpeas add crunch, while toppings like hummus, avocado, or yogurt-based dressings give a creamy contrast.
4. Perfect for Meal Prep – Make a big batch of chickpeas and assemble bowls all week. They’re great hot or cold, so you don’t even need a microwave.
5. Budget-Friendly – Canned chickpeas, basic veggies, and pantry spices make this a low-cost meal that doesn’t skimp on taste or nutrition.
These bowls are easy to love—delicious, simple to prepare, and great for just about any diet. Keep reading to find out what ingredients you’ll need and how to put your perfect bowl together.
What You’ll Need
Creating roasted chickpea bowls is easy when you have a few simple, wholesome ingredients on hand. Most of these items are pantry staples or easily found at your local grocery store. Here’s a basic list to build five delicious summer bowl variations:
For the Roasted Chickpeas:
- 2 cans (15 oz each) chickpeas, drained and rinsed
- 2 tablespoons olive oil
- 1 teaspoon garlic powder
- 1 teaspoon smoked paprika
- ½ teaspoon ground cumin
- Salt and pepper to taste
Base Options (choose one or mix & match):
- 1 cup cooked quinoa
- 1 cup cooked brown rice
- 1 cup couscous
- 1 cup chopped romaine or spring mix
Fresh Toppings:
- 1 cup cherry tomatoes, halved
- 1 cucumber, diced
- 1 avocado, sliced
- 1 red bell pepper, chopped
- 1 cup shredded carrots
- ½ red onion, thinly sliced
- ¼ cup chopped fresh parsley or cilantro
Optional Extras:
- ¼ cup crumbled feta (or dairy-free alternative)
- 2 tablespoons pumpkin or sunflower seeds
- Lemon or lime wedges for garnish
Dressing Ideas:
- Lemon-Tahini Dressing: 2 tbsp tahini, 1 tbsp lemon juice, 1 tsp maple syrup, 1 tbsp water, pinch of salt
- Greek Yogurt Herb Dressing: 2 tbsp plain Greek yogurt, 1 tbsp olive oil, 1 tsp dill, 1 tsp lemon juice
These ingredients are just the start. Once you know the basics, feel free to get creative with seasonal veggies, grains, or plant-based dressings.
How to Make Roasted Chickpea Bowls
Let’s walk through the process step-by-step. You’ll be roasting the chickpeas, preparing your base, and assembling the bowls. This batch makes about 4 servings.
Step 1: Roast the Chickpeas
- Preheat oven to 400°F (200°C).
- Dry the chickpeas thoroughly with a paper towel. Removing moisture helps them crisp.
- In a bowl, toss 2 cans of chickpeas with:
- 2 tablespoons olive oil
- 1 teaspoon garlic powder
- 1 teaspoon smoked paprika
- ½ teaspoon ground cumin
- Salt and pepper to taste
- Spread on a baking sheet in a single layer.
- Roast for 25–30 minutes, shaking the pan halfway through, until golden and crisp. Let cool.
Step 2: Prepare the Base
While chickpeas roast, cook your base (choose one):
- Quinoa: Rinse ½ cup quinoa and simmer in 1 cup water for 15 minutes.
- Brown rice: Cook ½ cup rice in 1 cup water or broth.
- Couscous: Pour ½ cup boiling water over ½ cup couscous, cover, let sit 5 minutes, fluff with fork.
- Greens: Wash and chop 2 cups of your favorite salad greens.
Step 3: Assemble the Bowls
Divide ingredients between 4 bowls:
- ¼ to ½ cup base
- ½ cup roasted chickpeas
- A mix of fresh veggies (cucumber, tomato, red onion, etc.)
- Optional toppings (avocado slices, seeds, feta)
- Drizzle with your choice of dressing
- Garnish with lemon or lime wedges and herbs
And that’s it—simple, colorful, and ready in under 40 minutes. Perfect for weekday lunches, summer picnics, or a light dinner.
You Must Know
Before diving in, here are a few key tips to make your roasted chickpea bowls truly shine:
- Dry Chickpeas Well: Damp chickpeas won’t crisp up. After rinsing, pat them dry thoroughly with paper towels.
- Use a Hot Oven: Roasting at 400°F is the sweet spot for crunchy chickpeas. Any lower, and they’ll stay soft.
- Don’t Crowd the Pan: Spread chickpeas in a single layer so they roast evenly. If they overlap, they’ll steam instead.
- Toppings Matter: The chickpeas are the star, but toppings bring the bowl to life. Use a mix of colors, textures, and flavors for the best results.
- Customize with Ease: Swap out ingredients based on what you have—kale for greens, corn for peppers, or hummus as a topping.
These quick tips help avoid soggy chickpeas and bland bowls. A little attention to detail turns something simple into something crave-worthy.
Perfecting the Cooking Process
Want the crispiest chickpeas and the freshest flavor? Here’s how to nail the process every time:
- Preheat First: Make sure your oven is fully preheated to 400°F before chickpeas go in. It makes a huge difference in crispness.
- Check at 25 Minutes: Some ovens run hot. Start checking chickpeas at 25 minutes and remove them once golden and crunchy.
- Let Them Cool: Chickpeas continue crisping as they cool. Leave them on the baking sheet for 10 minutes after roasting.
- Cook Grains Ahead: Make quinoa, rice, or couscous in advance. They store well and make bowl assembly quicker.
- Balance Flavors: Use lemon or lime juice for brightness, creamy toppings like avocado or yogurt for richness, and herbs for freshness.
Cooking chickpeas and assembling bowls is quick and easy, but mastering these steps will make your meals taste even better—and more consistent every time.
Add Your Touch
These bowls are made to be personalized, so feel free to get creative based on your mood, cravings, or what’s in the fridge.
Switch Up the Grains
Not a fan of quinoa? Try bulgur, farro, or even whole-wheat pasta. Want to go low-carb? Stick with leafy greens or cauliflower rice.
Add a Protein Boost
While chickpeas offer solid plant-based protein, you can mix in extras like grilled chicken, hard-boiled eggs, tofu, or tempeh for variety.
Flavor Twists
- Craving Mexican? Add corn, black beans, salsa, and a dollop of Greek yogurt.
- Mediterranean mood? Toss in kalamata olives, cucumber, and a light tzatziki drizzle.
- Go Asian-inspired with shredded cabbage, edamame, sesame seeds, and a soy-free ginger dressing.
Change the Crunch
If roasted chickpeas aren’t enough crunch, sprinkle in crushed tortilla chips, nuts, or toasted seeds.
Sauce It Up
The dressing transforms the bowl. Try hummus thinned with lemon juice, balsamic glaze, or even mashed avocado with garlic.
Make it yours, make it fun—and don’t be afraid to experiment.
Storing & Reheating
These bowls are great for meal prep and store well, but there are a few things to keep in mind:
Love simple meals like this? Here’s another to save for later.
Storage Tips
- Chickpeas: Store roasted chickpeas separately in an airtight container at room temperature for 2–3 days (they stay crisp longer that way).
- Grains & Veggies: Keep your base and chopped toppings in separate containers in the fridge. Good for 3–4 days.
- Dressings: Store in a jar with a lid and shake before using. Most will keep in the fridge up to a week.
Assembling Later
When ready to eat, combine your base, veggies, and chickpeas, then top with dressing. This keeps everything fresh and avoids sogginess.
Reheating?
- Chickpeas are best eaten at room temperature or lightly reheated in the oven (350°F for 5–7 minutes). Avoid the microwave—it softens them.
- Grains can be reheated with a splash of water in the microwave, covered, for 1–2 minutes.
Proper storage keeps your bowls tasting just as great on day three as they did fresh.
Chef’s Helpful Tips
Even simple recipes have room for pro-level touches. These tips will help you get better results with less guesswork.
This dish pairs perfectly with this easy side recipe.
1. Get Chickpeas Extra Crispy
After rinsing, let chickpeas air dry for 20–30 minutes before seasoning and roasting. The drier they are, the crunchier they’ll get.
2. Use Parchment Paper
Lining your baking sheet prevents sticking and helps with even roasting—no mess and easier cleanup.
3. Season After Roasting (Optional)
For extra bold flavor, toss roasted chickpeas in a pinch of seasoning while they’re still hot. Try chili powder, lemon zest, or za’atar.
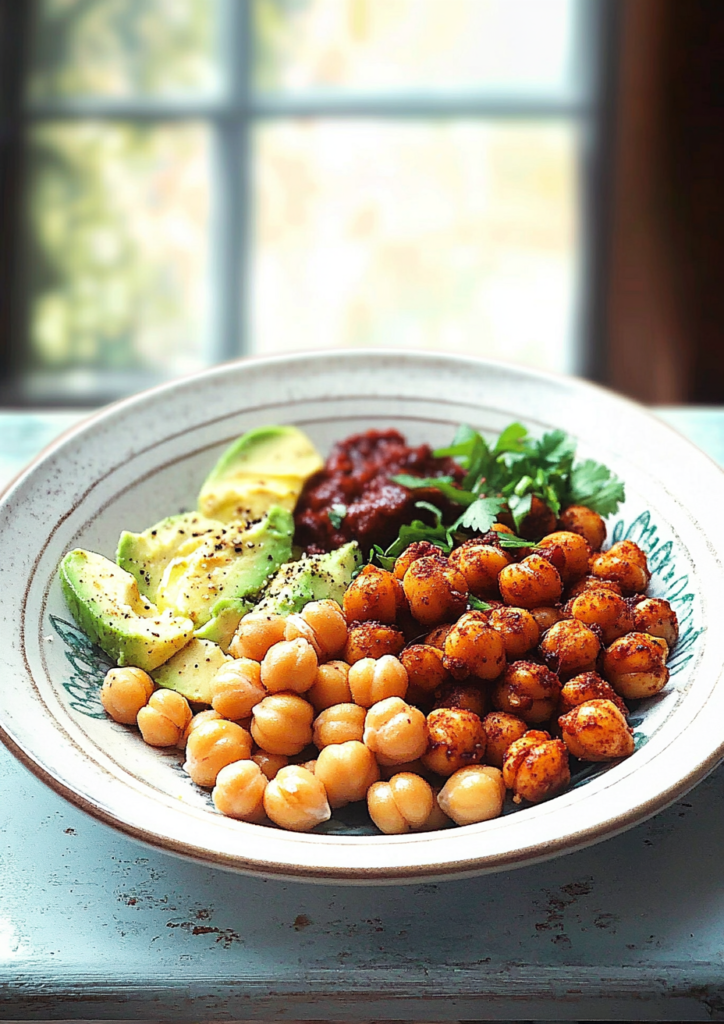
4. Make It Colorful
The more colorful your bowl, the more nutrients you’re likely including—plus, it looks beautiful and appetizing.
5. Keep Dressing Separate for Meal Prep
If prepping bowls ahead, pack dressing in a small container. Add just before eating to avoid soggy greens and grains.
6. Double the Chickpeas
Want snacks for later? Roast double the amount of chickpeas and keep extras for snacking—they’re great solo.
7. Use a Food Processor to Speed Up Chopping
This helps save time when prepping multiple toppings or if making bowls for a crowd.
These tips elevate your chickpea bowls from good to great—whether it’s for a weeknight dinner or packed lunch.
FAQ
1. Can I use dried chickpeas instead of canned?
Yes! Soak 1 cup dried chickpeas overnight, then simmer until tender (about 1 hour). Dry well before roasting.
Craving more easy dinner ideas? Don’t miss this one.
2. How long do roasted chickpeas stay crispy?
They’re crispiest the first day. To keep them crunchy longer, store them uncovered or in a paper bag for up to 2 days.
3. Are these bowls gluten-free?
They can be! Use quinoa or rice instead of couscous, and double-check all seasonings and dressings are labeled gluten-free.
4. What’s the best dressing to use?
Lemon-tahini is a classic, but you can use avocado dressing, yogurt-based sauces, or even a splash of olive oil and lemon juice.
5. Can I make these bowls dairy-free?
Absolutely. Skip the feta or use a plant-based version. Most of the ingredients are already dairy-free.
6. How can I make it more filling?
Add protein like grilled chicken, hard-boiled eggs, or extra seeds/nuts. A little hummus or whole grain pita on the side also helps.
Got another question? Leave it in the comments so we can keep improving this recipe!
Conclusion
These small roasted chickpea bowls are the perfect answer to summer meals that are light, filling, and full of flavor. Whether you’re prepping ahead for busy weekdays, hosting a sunny weekend lunch, or just looking for something colorful and healthy, this recipe checks all the boxes.
With endless ways to customize—from fresh veggies to grains and bold dressings—these bowls are as fun to make as they are to eat. Plus, they’re packed with plant-based protein, loaded with fiber, and naturally gluten- and dairy-free when you want them to be.
The beauty of this dish is how flexible it is. You can go Mediterranean, Southwest, or completely freestyle based on what’s in your fridge. And once you master the roasting process for those crispy chickpeas, you’ll want to make them on repeat.
So next time you’re craving something nourishing but easy, whip up one of these roasted chickpea bowls. You’ll feel good eating it—and even better knowing it only took minutes to throw together.
Let us know in the comments how you personalized your bowl. Happy cooking!
5 Simple and Delicious Small Roasted Chickpea Bowls for Summer
Description
A simple, nutritious bowl featuring crispy roasted chickpeas over a bed of fresh greens and grains. Perfect for a quick, healthy summer meal with endless ways to customize.
Ingredients
Instructions
Preheat oven to 400°F (200°C).
Toss chickpeas with olive oil, paprika, garlic powder, and salt. Spread on a baking sheet.
Roast chickpeas for 25-30 minutes, stirring halfway, until crispy. Let cool.
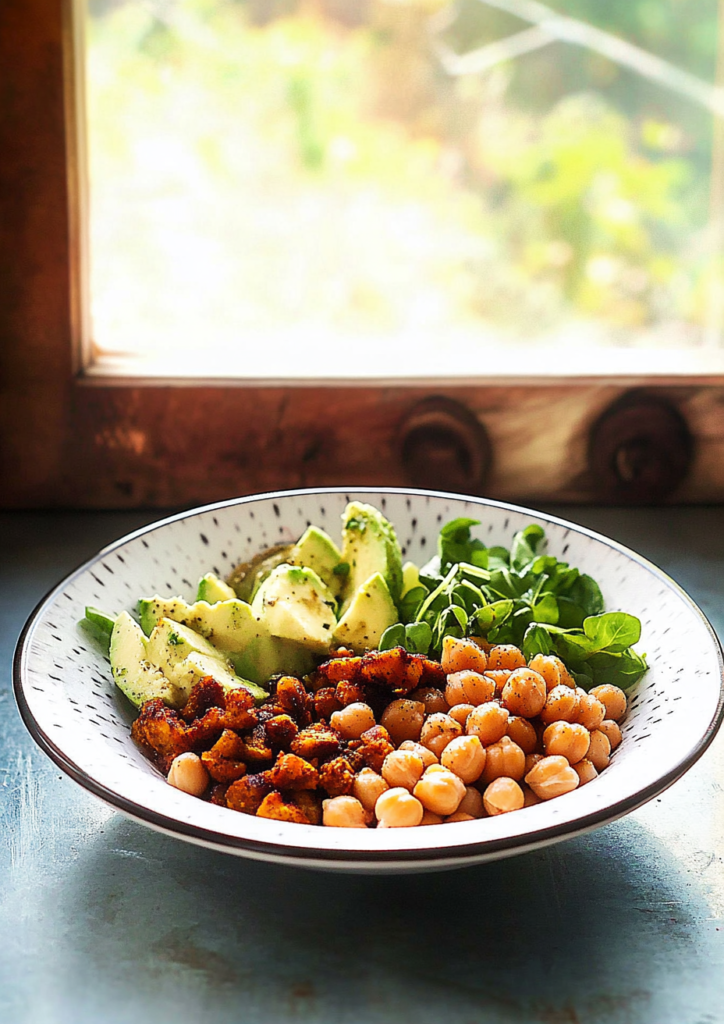
Assemble bowls with quinoa, greens, cherry tomatoes, avocado, and herbs.
Top with roasted chickpeas and a squeeze of fresh lemon juice. Serve immediately.
Notes
- Pat chickpeas very dry before roasting for extra crunch.
Use any cooked grain or leafy greens you like.
Add a dollop of hummus or tahini for creaminess.
Store chickpeas separately to keep crisp.