
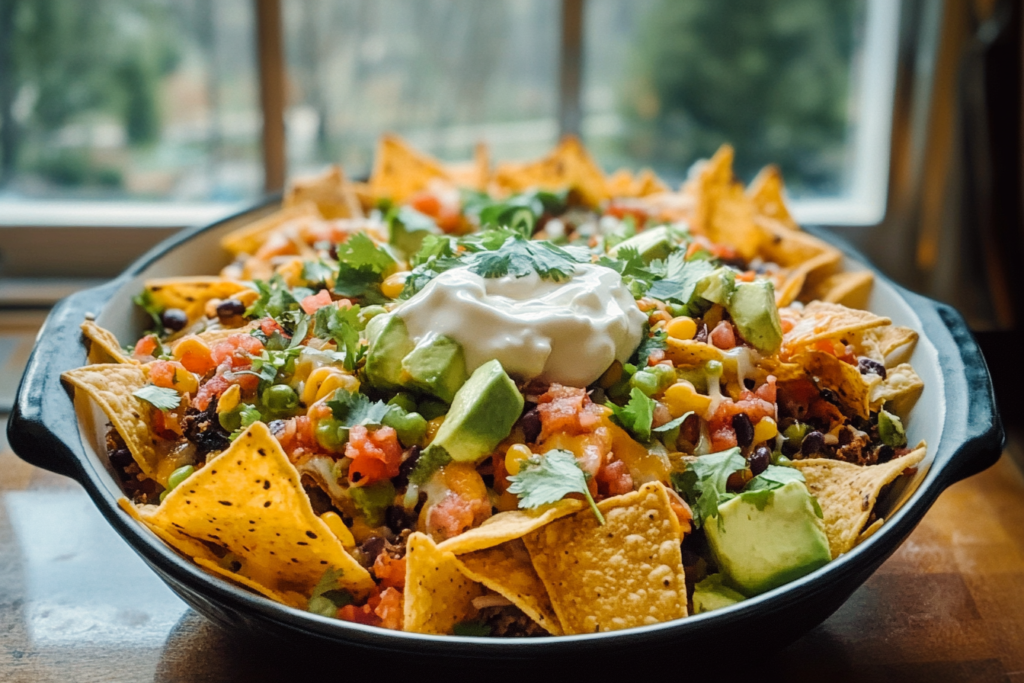
There’s nothing like gathering around a campfire with a hearty meal everyone can enjoy—especially when that meal is Campfire Nachos. This easy recipe is loaded with melted cheese, crunchy tortilla chips, and fresh toppings, all cooked over an open flame. It’s quick to prepare, doesn’t require fancy gear, and is ideal for sharing.
Perfect for families or groups of friends, these nachos bring people together after a long day of hiking, swimming, or relaxing outdoors. Whether you’re using a cast-iron skillet or a foil tray, this recipe is super flexible. Plus, no need to worry about clean-up—just toss everything in and let the fire do the work.
Why You’ll Love This Campfire Nachos Recipe
Campfire Nachos are a camping favorite for a reason—they’re fast, fun, and fully customizable. Whether you’re feeding picky eaters, vegetarians, or spice lovers, this dish works for everyone. Just layer chips, cheese, and your choice of toppings, then heat it up until gooey and golden.
One-pan meals are a lifesaver outdoors, and this one’s practically mess-free. No bowls, no stress—just delicious bites packed with smoky flavor. You can load them with beans, grilled chicken, or extra veggies and adjust the heat with jalapeños or hot sauce.
Even better? They’re perfect for sharing. Serve them right from the pan around the fire and let everyone dig in. Whether it’s your first camping trip or you’re a seasoned outdoor cook, this recipe always delivers.
What You’ll Need
Campfire Nachos keep things simple, using easy-to-pack ingredients and minimal gear. All you need is a skillet or foil pan, a heat source, and your favorite toppings.
Basic Equipment:
- Cast iron skillet or foil pan
- Tongs or spatula
- Aluminum foil
Key Ingredients:
- 10 oz thick tortilla chips
- 2 cups shredded cheese (cheddar or Monterey Jack)
- 1 can black beans (15 oz), drained
- 1 cup corn kernels
- 1 cup cherry tomatoes, halved
- ½ cup chopped red onion
- 1–2 sliced jalapeños (optional)
- 1 avocado, diced
- ⅓ cup chopped cilantro
- Sour cream or Greek yogurt (for topping)
- Lime wedges (to squeeze over)
Feel free to add pre-cooked chicken, seasoned ground beef, or keep it vegetarian—totally up to you!
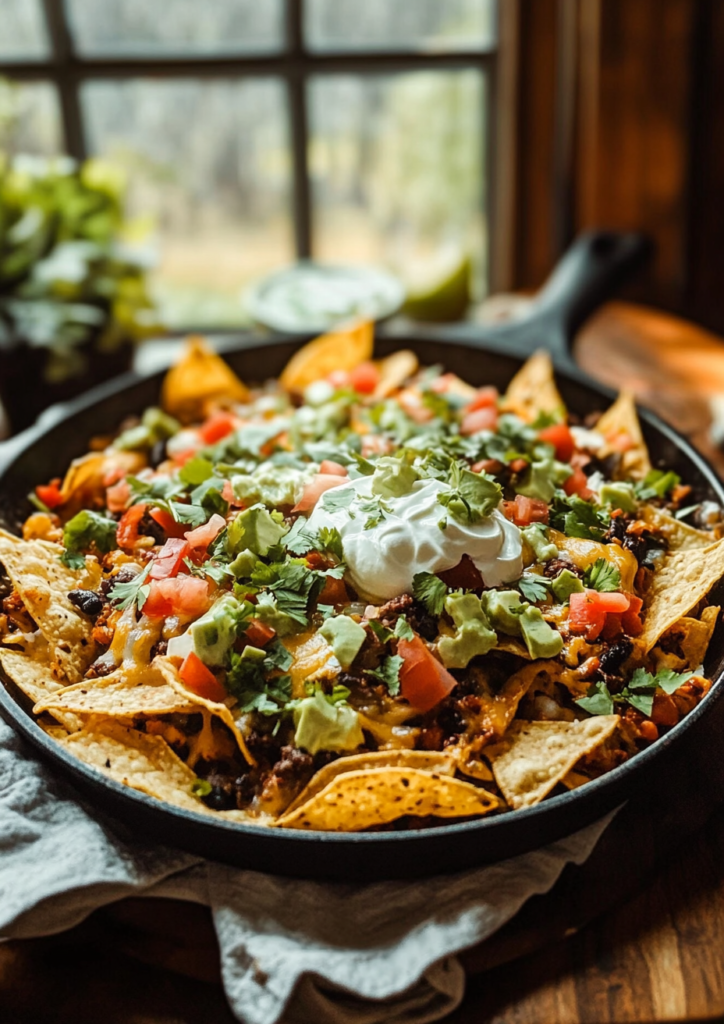
How to Make Campfire Nachos Recipe
Now let’s build the ultimate skillet of Campfire Nachos—crispy, cheesy, and fire-kissed in all the right ways. Here’s a step-by-step guide with measurements to make 4–6 servings:
Ingredients:
- 10 oz thick tortilla chips
- 2 cups shredded cheddar or Monterey Jack cheese
- 1 can (15 oz) black beans, drained
- 1 cup halved cherry tomatoes
- 1 cup corn kernels
- ½ cup chopped red onion
- 1–2 sliced jalapeños (optional)
- 1 diced avocado
- ⅓ cup chopped cilantro
- Sour cream or Greek yogurt, to taste
- Lime wedges, for serving
Instructions:
- Prep Your Fire or Heat Source
Get your campfire going or preheat your grill to medium heat. Let the flames die down slightly so the food doesn’t burn—you’re aiming for steady heat. - Layer the Nachos
In your skillet or foil pan, spread a layer of chips, followed by cheese, beans, corn, onions, and tomatoes. Repeat the layers until all ingredients are used, finishing with a generous layer of cheese on top. - Cover and Cook
Cover the skillet with foil to trap heat and help melt the cheese. Place over your fire or grill, and cook for 10–15 minutes. Check occasionally—once the cheese is melted and bubbly, they’re ready. - Add Fresh Toppings
Remove from heat and carefully take off the foil. Top with avocado, cilantro, sour cream, and a squeeze of lime juice. - Serve Immediately
Eat straight from the skillet for a fun, communal experience, or scoop onto plates if preferred.
These nachos are fast, satisfying, and guaranteed to disappear in minutes. Plus, cleanup is a breeze—perfect for outdoor meals.
You Must Know Campfire Nachos Recipe
Before diving into campfire nachos, here are some key things every camper should know:
- Use sturdy chips: Thin tortilla chips fall apart easily—go for restaurant-style or thick-cut for the best crunch.
- Prep at home: Chop your veggies, rinse beans, and shred cheese before the trip. Store in airtight containers to save time and space.
- Layer wisely: Don’t dump everything on at once. Build layers of chips, cheese, and toppings for even flavor and melty goodness in every bite.
- Watch the heat: Flames can burn the bottom. Cook over coals or low flames and rotate the pan to avoid hot spots.
- Bring foil: Covering the pan helps trap heat and melt cheese faster without drying out your toppings.
- Customize freely: Whether you’re gluten-free, vegetarian, or spice-loving, nachos adapt to your preferences with ease.
This dish is all about smart prep and flexible cooking. Knowing these simple tips will make your campfire nachos a success every single time.
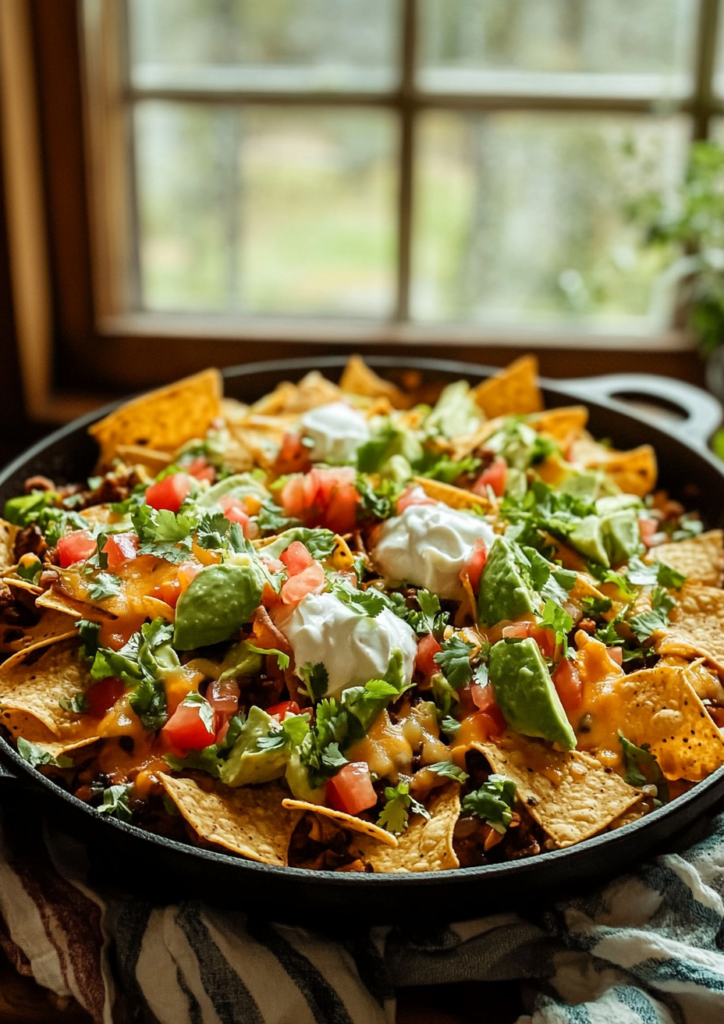
Perfecting the Cooking Process
To get perfectly melted cheese and crispy—not soggy—chips, you need just the right cooking technique.
Start with even heat. Use hot coals or a medium grill. Too much flame can burn the bottom, while too little won’t melt the cheese. Set your pan on a grill grate or rock-supported rack over the fire.
Layer slowly. Start with a base of chips, sprinkle on cheese, then add beans, corn, and other toppings. Repeat 2–3 layers. Top everything with extra cheese.
Cover with foil tightly and let the nachos heat up for about 10–15 minutes. Rotate the pan occasionally if using direct fire to prevent uneven cooking.
Check for melting. Once the cheese is bubbly and melted through, carefully remove the pan from heat. Uncover and top with fresh ingredients like avocado, cilantro, and lime juice.
Done right, the chips will stay crisp on the edges, and the cheese will melt into every bite—exactly how nachos should be.
Add Your Touch
One of the best parts of campfire nachos is how easy it is to make them your own. Whether you’re feeding kids, vegetarians, or spice lovers, the toppings can be fully customized to suit everyone’s taste.
Want more protein?
Add pre-cooked chicken, ground turkey, shredded beef, or even grilled tofu. For a plant-based protein boost, toss in extra black beans, pinto beans, or lentils.
Need dairy-free?
Use vegan cheese or skip the cheese and drizzle with guacamole, salsa verde, or tahini sauce instead.
Add more flavor layers:
- Sliced olives
- Pickled red onions
- Roasted bell peppers
- Pineapple chunks (for sweet & spicy combo)
- Fresh jalapeños or hot sauce for heat lovers
Kid-friendly version?
Keep it mild. Skip spicy ingredients and serve with sides like sour cream, ketchup, or a cheesy dip.
You can even make individual foil packs with personalized ingredients for each camper. Campfire nachos are all about creativity and fun—so don’t hold back!
Storing & Reheating
If you happen to have leftovers (which is rare!), you can store and reheat your nachos with ease—even at the campsite.
How to Store:
Explore this flavorful twist on a classic favorite.
- Let nachos cool completely.
- Transfer to an airtight container or wrap tightly in foil.
- Keep in a cooler with ice or in a fridge if you’re in an RV.
Reheating at Camp:
- Wrap leftovers in foil and place over hot coals or on a grill for 5–10 minutes.
- You can also reheat in a pan with a lid over low heat.
- Add a little fresh cheese before reheating for extra gooeyness.
At Home:
Use an oven at 350°F for 10–12 minutes or reheat in an air fryer. Microwave works too, but chips may lose their crunch.
For best texture, nachos are always tastier fresh—but with the right method, even leftovers can still hit the spot.
Chef’s Helpful Tips for Campfire Nachos Recipe
Want next-level nachos? These quick pro tips will help you make the most of your campfire meal:
1. Prep at home.
Dice onions, slice jalapeños, shred cheese, and rinse beans before leaving for your trip. Store everything in zip-top bags or reusable containers for easy access at the campsite.
This simple, satisfying dish is a must-try next.
2. Use heavy-duty foil or cast iron.
Thin foil pans can burn quickly. Cast iron skillets or thick, disposable trays work best for even cooking and heat retention.
3. Don’t overload.
Too many wet toppings at once can lead to soggy chips. Keep it balanced: layer thoughtfully and add fresh items like avocado or sour cream after cooking.
4. Cook low and slow.
Direct flames can scorch the bottom. Instead, cook over low heat or hot coals, rotating the pan if necessary for even melt.
5. Keep toppings handy.
Set out your garnishes buffet-style so everyone can build their perfect bite. It’s a fun and social way to enjoy this camp classic.
6. Make it a meal.
Turn nachos into a full dinner by adding hearty ingredients like grilled chicken, beans, or even scrambled eggs for a breakfast twist.
These simple techniques guarantee better texture, more flavor, and fewer burnt chips—every time.
FAQ for Campfire Nachos Recipe
Can I make this without a campfire?
Yes! These nachos cook great on a grill, over a charcoal pit, or even on a portable stove. At home? Just pop them in the oven at 375°F for 10–15 minutes.
Try this crowd-pleasing recipe perfect for weeknights.
How do I prevent soggy nachos?
Use thick tortilla chips and layer ingredients carefully. Avoid adding too much moisture—drain beans and tomatoes before using, and save wet toppings like sour cream for after cooking.
Can I make individual portions?
Absolutely. Use small foil packets for personal servings. Let each camper build their own mix of toppings before heating over the fire.
What if I don’t have foil?
A lid or even another upside-down pan can work to trap heat and melt cheese. Foil just makes cleanup easier.
What cheese works best?
Cheddar, Monterey Jack, or a Mexican blend melt beautifully. Mix a couple for better flavor and texture.
Can I make this vegetarian or gluten-free?
Yes! Use vegetarian toppings like beans, corn, and avocado. For gluten-free, just choose certified gluten-free tortilla chips.
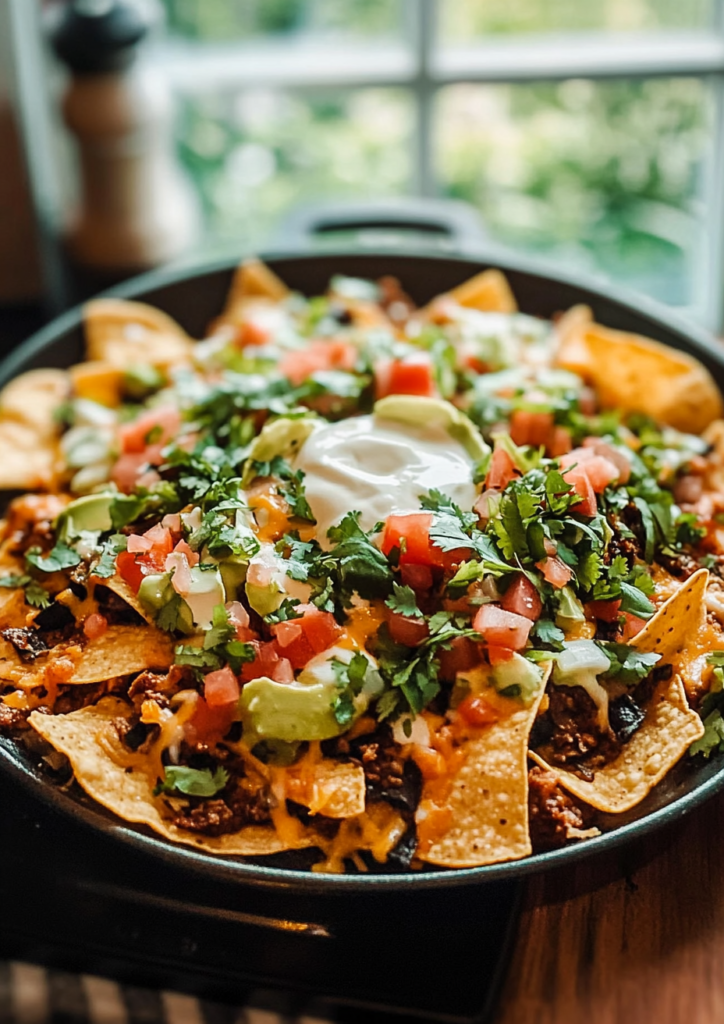
Conclusion
Campfire Nachos are more than just a fun camping recipe—they’re an easy, satisfying way to bring everyone together outdoors. With minimal prep, simple ingredients, and endless ways to customize, they’re perfect for feeding a hungry crew after a long day in nature.
Whether you’re gathered around a fire pit or cooking on a camp stove, these nachos deliver flavor, comfort, and convenience all in one skillet. From cheesy layers to fresh toppings, each bite is packed with smoky, crunchy, and melty goodness.
So next time you’re packing for an outdoor trip, skip the boring snacks—bring the nachos. With this easy recipe, you’re ready to make your next camping meal unforgettable.
The Best Campfire Nachos Recipe for an Easy Outdoor Meal
Description
Quick and cheesy campfire nachos packed with fresh toppings and smoky flavor — the perfect meal for any camping trip or outdoor gathering.
Ingredients
Instructions
Prepare your campfire or grill to medium heat with glowing embers.
In a cast iron skillet or foil pan, layer half the chips, then half the cheese, beans, corn, onions, tomatoes, and jalapeños. Repeat the layers, finishing with cheese on top.
Cover the skillet tightly with foil and cook over the fire for 10–15 minutes, until cheese is melted and bubbly.
Remove from heat carefully, uncover, and top with avocado, cilantro, sour cream, and a squeeze of lime.
Serve immediately and enjoy!
Notes
- Use sturdy chips to avoid sogginess.
Prep veggies and shred cheese before your trip for easier cooking.
Customize with cooked chicken or extra veggies as desired.
Store leftovers in a sealed container in a cooler and reheat over coals or grill.