
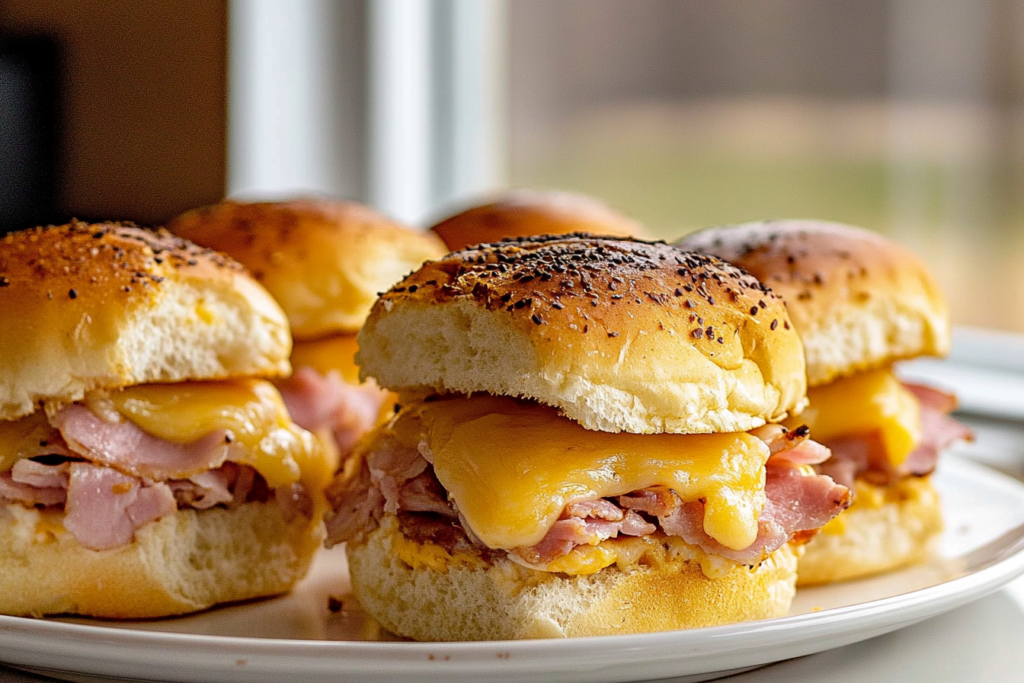
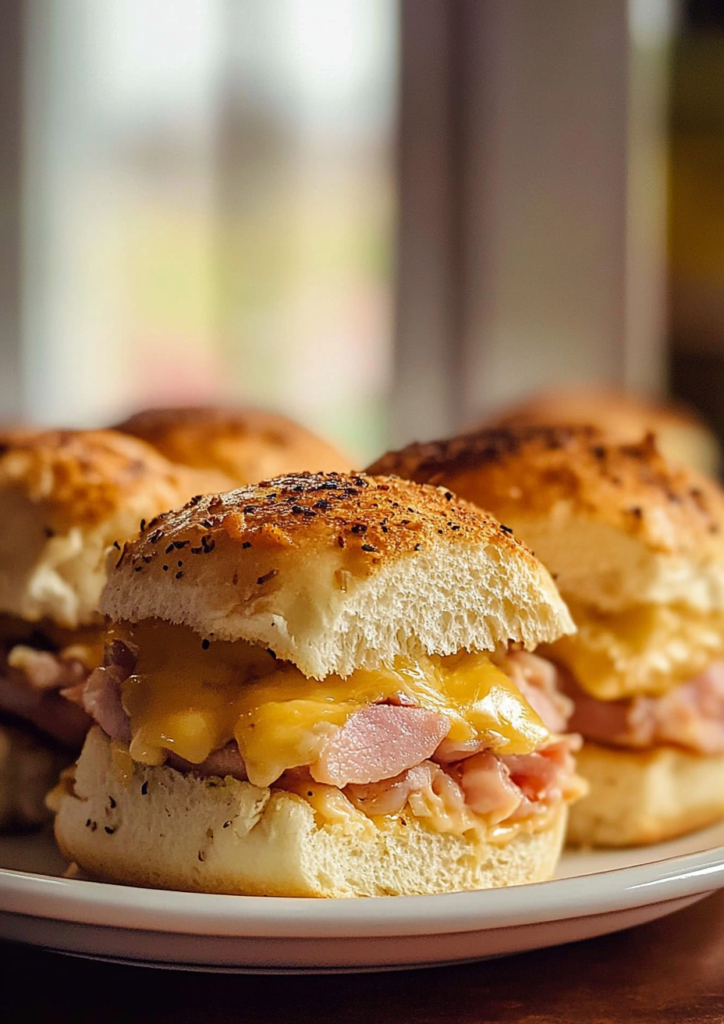
The back-to-school season can be hectic, and finding meals that are fast, easy, and satisfying becomes a top priority. That’s where these Irresistible Back-to-School Ham and Cheese Sliders come in. Made with soft slider buns, melty cheese, and savory turkey or beef ham (no pork here!), these sliders are the perfect grab-and-go meal for busy families.
Whether you need a quick dinner, a lunchbox surprise, or a crowd-pleasing snack, this recipe checks every box. It’s simple enough for beginners, delicious enough for picky eaters, and versatile enough to customize with your favorite ingredients. Plus, the whole thing comes together in under 30 minutes.
As a bonus, they store well and reheat beautifully—great for meal prep or last-minute dinner ideas. Get ready to make your weeknights a little easier and a lot tastier with this family-friendly favorite!
Why You’ll Love This
These ham and cheese sliders are everything a busy parent dreams of: fast, flavorful, and foolproof. With just a few ingredients—slider buns, cheese, and smoked turkey or beef ham—you’ll have a hot, comforting meal that feels homemade and hearty.
The buttery glaze on top is the secret weapon—it crisps up in the oven, giving each bite that perfect golden finish. Plus, you can easily swap cheeses, add a slice of tomato, or spread on some mustard or mayo to make them your own.
They’re also super convenient. Prep them ahead, bake when needed, and enjoy leftovers the next day. Whether you’re feeding hungry kids after school or packing something special for lunch, these sliders are sure to become a regular in your rotation.
What You’ll Need
These sliders keep things simple and satisfying. Here’s what to grab:
- 12 slider buns or Hawaiian rolls – Soft and slightly sweet.
- ¾ lb turkey ham or beef ham – Pork-free, flavorful, and lean.
- 6–8 slices of cheese – Cheddar, Swiss, provolone, or mozzarella.
- 2 tbsp mayonnaise (optional)
- 1 tbsp yellow or Dijon mustard (optional)
For the Glaze:
- ¼ cup melted butter
- ½ tsp garlic powder
- ½ tsp onion powder
- ½ tbsp dried parsley
- 1 tsp poppy seeds (optional)
- Salt, to taste
Optional add-ons: tomato slices, pickles, or baby spinach. Everything can be found at most grocery stores, and you can easily swap things out to suit your family’s preferences.

How to Make Ham and Cheese Sliders
This recipe is fast and foolproof:
- Prep: Preheat oven to 350°F. Lightly grease a 9×13 pan.
- Build: Slice slider rolls in half. Layer the bottom with mayo or mustard (if using), then add ham and cheese. Top with the other bun halves.
- Butter Topping: Mix melted butter with seasonings. Brush over the tops of the buns.
- Bake: Cover with foil and bake for 15 minutes. Uncover and bake 5–7 minutes more until golden and melty.
- Serve: Slice and enjoy warm or pack for later!
Quick, cheesy, and guaranteed to please.
You Must Know
Before diving in, there are a few key things to know that can take your sliders from good to amazing:
- Choose quality ham: Since we’re skipping pork, go for a smoked turkey or beef ham with great flavor and minimal added sugars.
- Cheese choice matters: Use a cheese that melts well—cheddar for sharpness, provolone for stretch, or Swiss for a nutty bite.
- Don’t skip the glaze: The buttery topping is what makes these sliders stand out. It adds crispness, richness, and that golden finish everyone loves.
- Bake covered first: This keeps the buns soft and melts the cheese perfectly. Uncover at the end for a toasted top.
- Let them rest a minute: Allowing them to sit for 5 minutes before serving makes them easier to slice and eat.
These small details help guarantee perfect sliders every time—and they only take a few extra seconds!
Perfecting the Cooking Process
Want restaurant-quality sliders at home? Here’s how to get them just right:
- Even layering: Keep ham and cheese evenly spread to make sure each bite has both.
- Use parchment or foil: Prevent sticking and make cleanup easier.
- Cover while baking: This traps heat and melts the cheese fully without burning the buns.
- Finish uncovered: The last few minutes uncovered help the tops get lightly crisp and golden.
- Check for doneness: Cheese should be fully melted, and tops should be just toasty—not too hard.
Bonus tip: use a serrated knife to cut the sliders cleanly once they’re done. You’ll get nice, neat squares that look as good as they taste.

Add Your Touch
One of the best things about these sliders is how easy they are to customize. Once you master the basic version, try adding your own spin:
- Switch the cheese – Use pepper jack for a kick, mozzarella for a gooey pull, or a slice of American for classic comfort.
- Try flavored condiments – Swap in honey mustard, chipotle mayo, or garlic aioli for extra flavor.
- Add crunch – Layer in thin pickles, shredded lettuce, or even crispy fried onions after baking.
- Make it veggie – Use grilled mushrooms, sautéed spinach, or roasted red peppers instead of meat for a vegetarian option.
- Make it spicy – Add jalapeños or a touch of hot sauce inside for a bold twist.
These sliders are a blank canvas. Whether you’re feeding picky eaters or adventurous snackers, you can tweak them to fit any taste.
Storing & Reheating
These sliders are just as good the next day—maybe even better. Here’s how to store and reheat them right:
Perfect for Busy Weeknights – See How
- To store: Let sliders cool completely. Wrap them in foil or place in an airtight container. Keep in the fridge for up to 3 days.
- To freeze: Wrap tightly in foil, then place in a freezer-safe bag or container. They’ll keep well for up to 2 months.
- To reheat (oven): Place in a 350°F oven for 10–12 minutes, covered with foil to prevent over-browning.
- To reheat (microwave): Microwave individual sliders for about 30–45 seconds. Add a damp paper towel over the top to keep the bread soft.
Avoid soggy buns by reheating in the oven whenever possible—it helps restore that buttery crispness on top.
Chef’s Helpful Tips
To make your ham and cheese sliders truly foolproof, here are some smart tips straight from the kitchen:
Try This Crowd-Pleasing Favorite Next
- Keep rolls connected: Slicing and layering the buns as one big piece makes assembling and serving much easier.
- Use room temp ingredients: Let your ham and cheese sit out for 10 minutes before assembling. They’ll melt more evenly.
- Don’t overload: Too much filling can make the sliders fall apart. Keep layers balanced so they hold together after baking.
- Brush, don’t pour: Brushing the glaze on helps coat evenly and avoids soggy spots.
- Serve fresh out of the oven: They’re crispiest and most flavorful right after baking. If prepping ahead, reheat before serving.
A little planning goes a long way. Stick to these basics, and your sliders will always turn out delicious and crowd-pleasing.
FAQ
Can I use different bread?
Yes! Brioche buns, mini ciabatta, or dinner rolls all work. Just avoid anything too hard or crusty.
Discover More Easy Recipes You’ll Love
What’s the best cheese for melting?
Provolone, mozzarella, Swiss, and cheddar are all great choices. Go with what your family likes best.
Can I make these ahead of time?
Absolutely. Assemble the sliders and cover with foil. Store in the fridge up to 24 hours before baking.
Do they freeze well?
Yes! Freeze fully baked sliders, then reheat in the oven for a quick snack or lunch option.
What can I use instead of ham?
Try roasted turkey slices, grilled chicken, or even plant-based deli meat if you’re looking for a vegetarian or non-ham option.
Conclusion
Back-to-school season can be hectic, but mealtime doesn’t have to be. These Ham and Cheese Sliders are the perfect answer to busy nights, lunchbox prep, or quick weekend bites. With simple ingredients, customizable options, and minimal cleanup, they’re a no-fuss solution that’s still full of flavor and comfort.
Whether you’re feeding kids after school, prepping for a party, or just craving something warm and cheesy, this recipe delivers every time. The savory ham, melty cheese, and buttery golden glaze make each bite irresistible. And because they’re pork-free and easy to adapt, they fit right into a wide range of dietary needs.
Even better, this recipe is designed for real life—make it ahead, freeze a batch, or reheat leftovers without losing that fresh-baked goodness. Don’t be surprised if these sliders become a regular request in your kitchen!
So fire up the oven, grab your ingredients, and give this recipe a try. You’ll love how easy it is to create something everyone at the table will devour.
How to Make Irresistible Back-to-School Ham and Cheese Sliders in Under 30 Minutes
Description
These easy ham and cheese sliders are perfect for quick weeknight dinners or back-to-school lunches. Soft rolls loaded with savory ham and melty cheese, topped with a buttery garlic glaze—ready in under 40 minutes!
Ingredients
Instructions
Preheat oven to 350°F. Grease a 9×13 pan.
Slice buns in half horizontally and layer bottom halves with mustard or mayo if using.
Add ham and cheese evenly, then place top halves on.
Mix melted butter with garlic powder, onion powder, parsley, salt, and poppy seeds. Brush over buns.
Cover with foil and bake for 15 minutes. Uncover and bake 5–7 more minutes until golden.
Let rest 5 minutes, slice, and serve warm.
Notes
- For best results, use fresh buns and room temperature ingredients.
Customize with your favorite cheese or add pickles for extra crunch.
These sliders freeze well—wrap tightly and reheat in the oven.